How to Use Git in Overleaf
Introduction
Overleaf is an online latex environment. It allows for easier collaboration and online management of the documents. As a PhD student, this is one of the integral software because I handle all of my writing with the help of Overleaf. Document history is integral for me because of the collaboration I have with my mentor. However, Overleaf has moved the ability to longer document histories behind the subscription tier. Hence, an alternative way of handling this is discussed in this post. An added benefit is the ability to work on the local machine without needing access to internet.
Git Integration
By storing the document history in git, there is no limit to the document history. This is easy to setup. First, you need to generate git token.
Git token
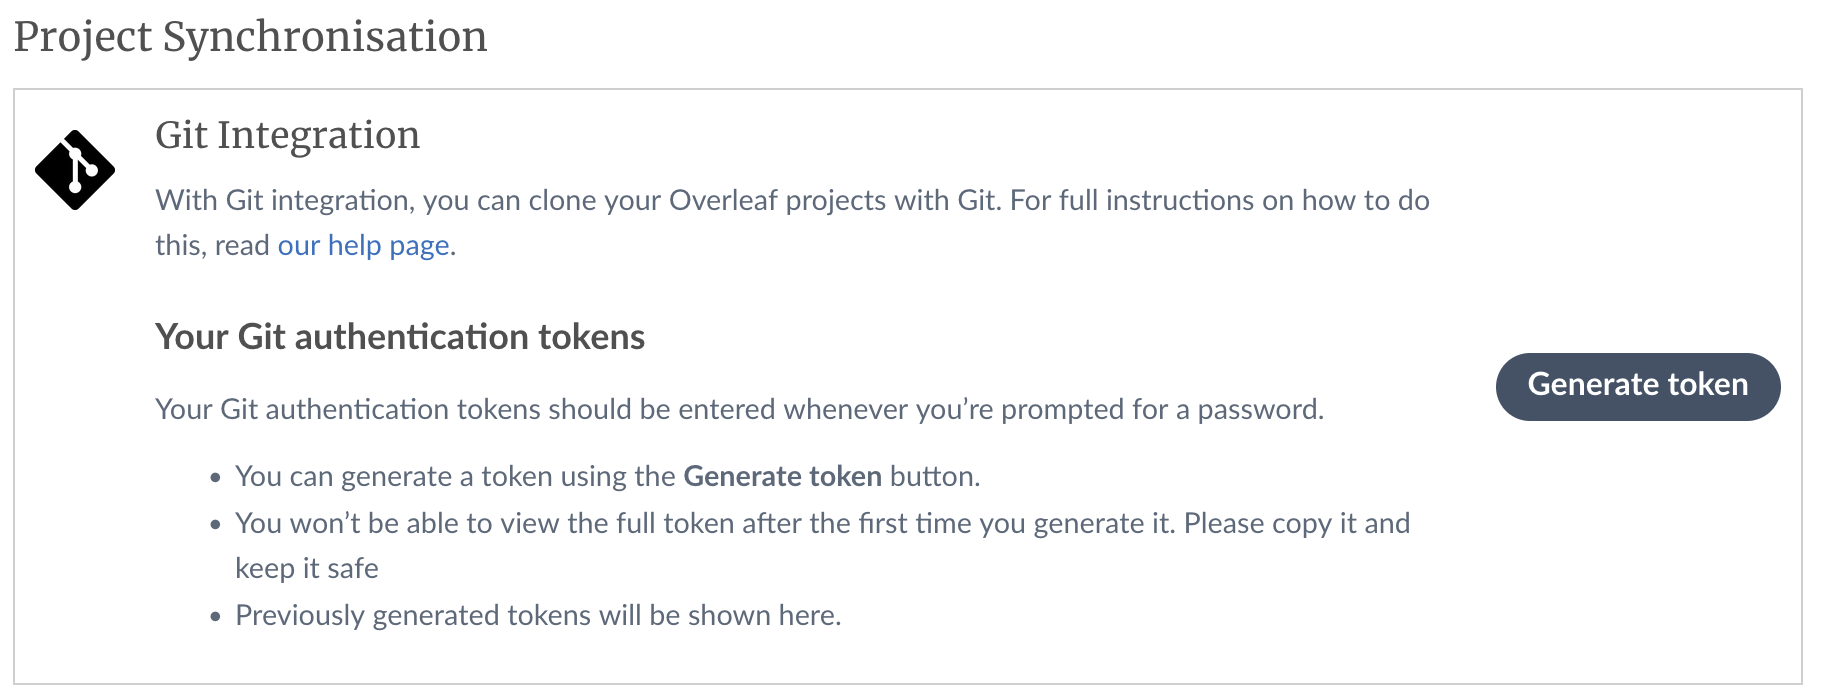
Click on the Account Settings and you will notice a project synchronization section. One of the options will be Git Integration. Click on the Generate token button as shown below:

Save the generated key in a secure location, as you won’t be seeing this key in the future. If you already have a key generated, but do not know where is it, then you can delete it and recreate a new key.
Git Synchronization
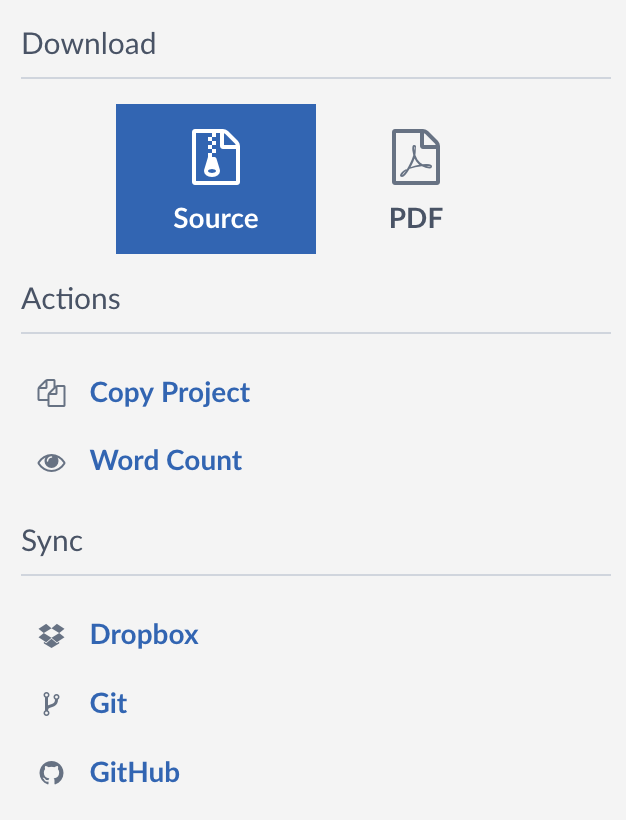
Go to the Menu on the top-left:

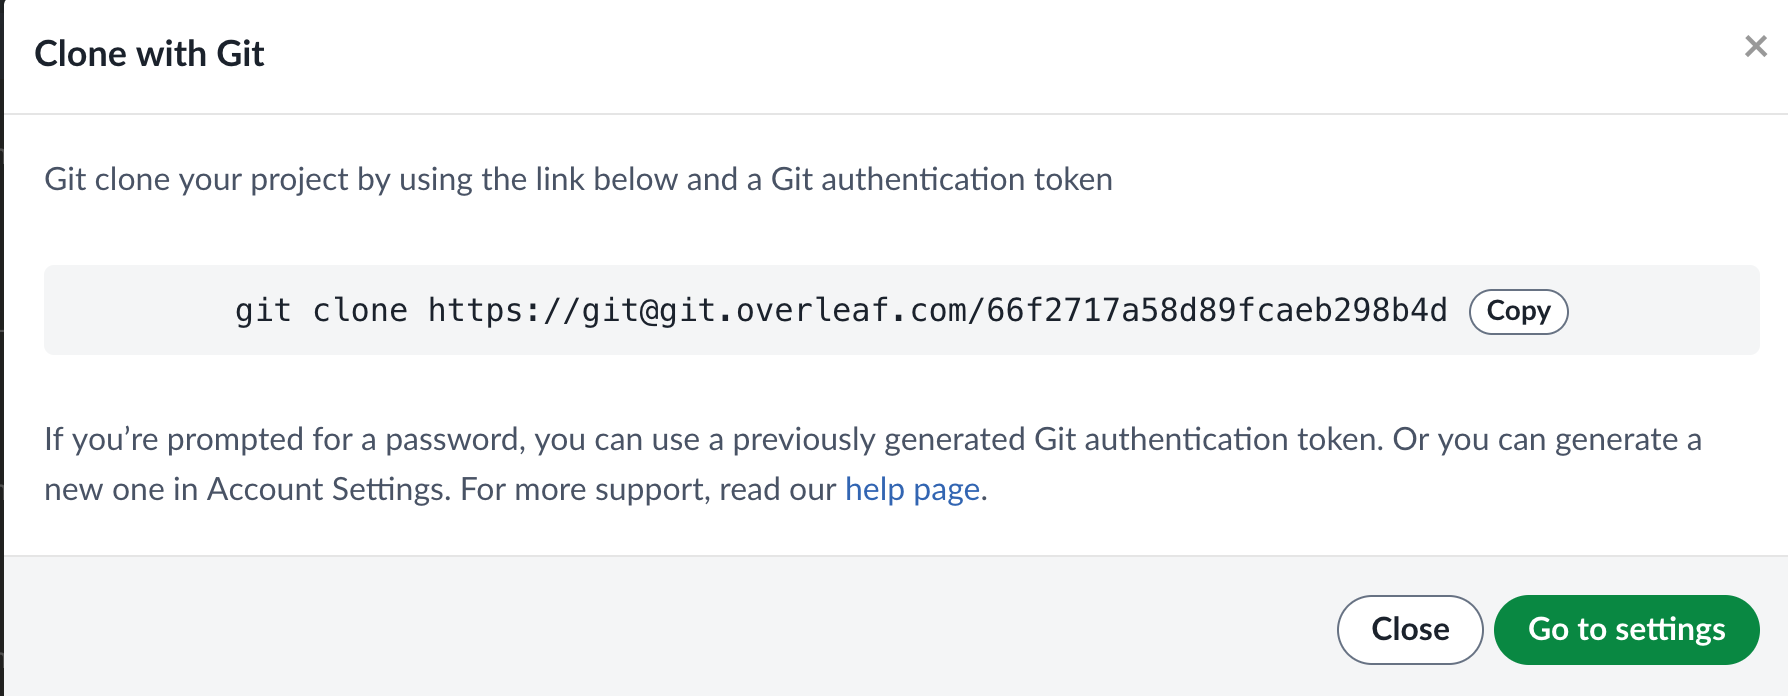
Click on the Git button to open the following window:

Local Copy
Copy the command as is to clone the project to your local machine. It is suggested to give a custom name at the end of the command to prevent directories with awkward names. For example:
git clone https://git@git.overleaf.com/66f2717alsdjfaliwoeru <custom_name>
It will prompt for the username and password. Give the same email as your overleaf account. For password, enter the token created in the previous step. Upon successful authentication, the command will clone the repository to the folder with name custom_name.
Bonus tip
The git integration combines all the changes into one big change. Granular history is not maintained. This can be avoided by setting up a Cron job that regularly pushes the local changes to overleaf.
Enjoy Reading This Article?
Here are some more articles you might like to read next: